 RSS - Posts


This is not a free 2D resource. Do not include any files of this package in your project planed to distribute. Use only to make your rendering images.
I don’t really like to use large props like buildings. I have some props of wide area scene but have rarely used them. Such wide area sets require high skill in handling cameras and lighting. I have little such skills. I’m always looking for how to make images easily. So I don’t want to load a lot of objects into a scene. I have some textures that can be tiling when I need a wide ground.
I put this in ShareCG. If you don’t want to read my tedious talk, here is the link;
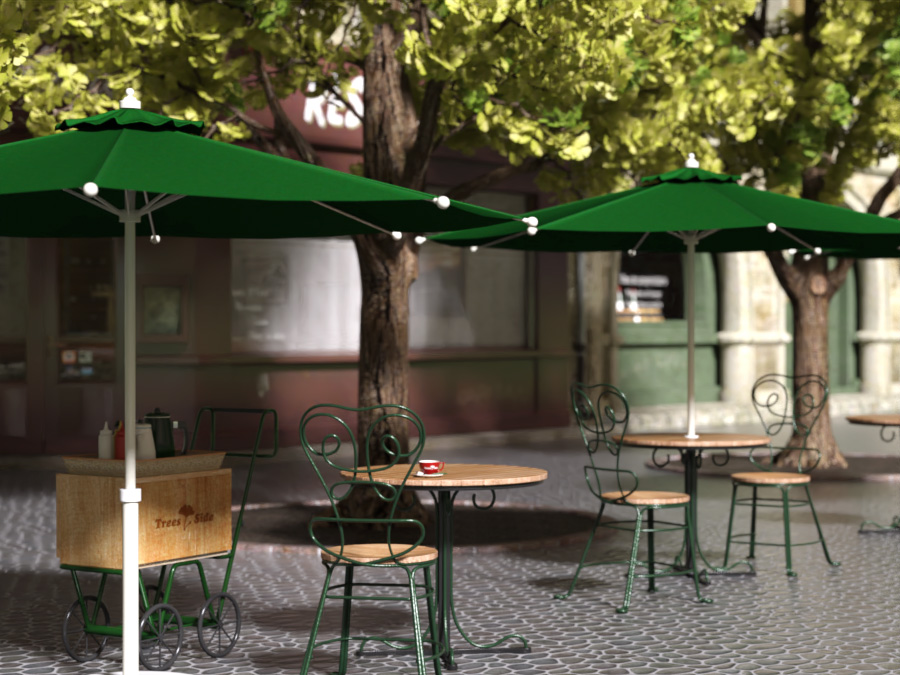
Pavement Cafe Props – Pavement
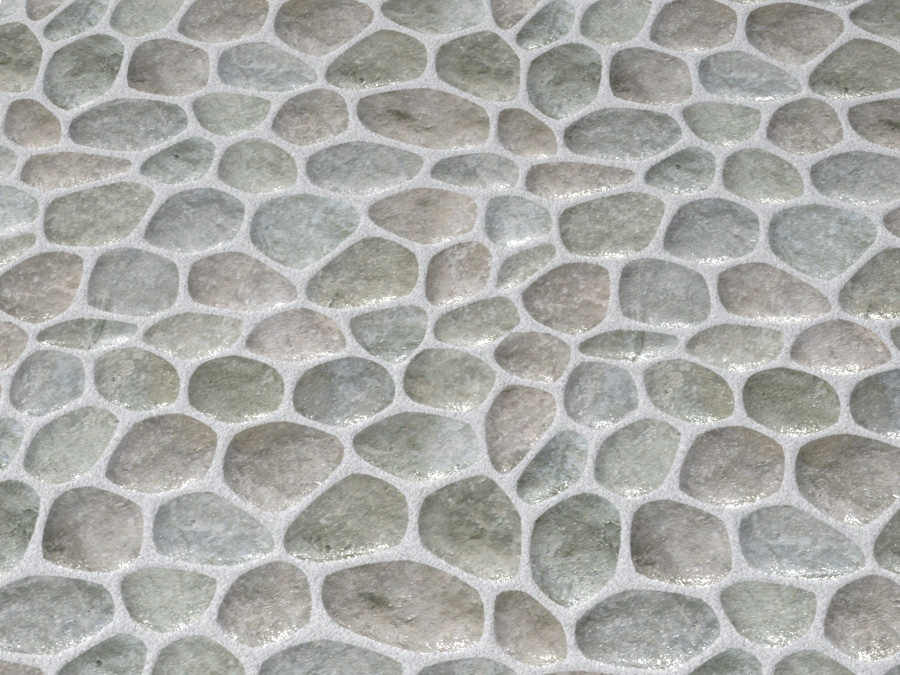
I used Faveral’s buildings set several times when making promotional images of my Pavenet Cafe Props. That vendor’s Le Village Bundle also includes realistic pavement road props. But, I am a lazy person, I didn’t try to use them. My tiling textures are useful for me because they have no area limit. I made them with a slight retouched of the images which I purchased. I can’t distribute them. I want a texture for include in my props set. So I thought I try to make it. This time I make a slightly three-dimensional pattern with a normal map.
The latest Photoshop makes it easier to create normal maps, but my Photoshop is old version. I have to model for a tilable pattern. First, make an image like this with Adobe Photoshop’s stained glass filter.
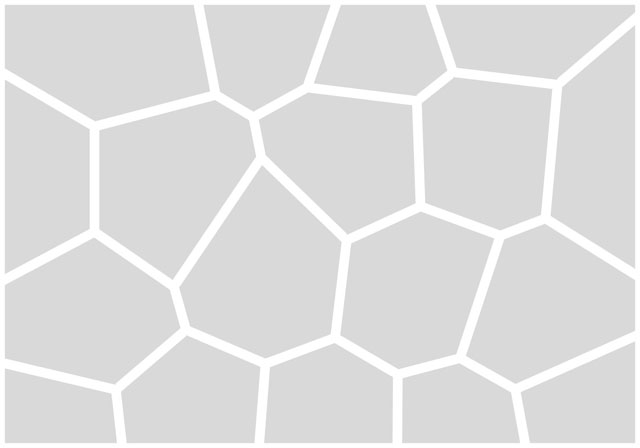
Use it as a rough sketch and draw lines with Adobe Illustrator.
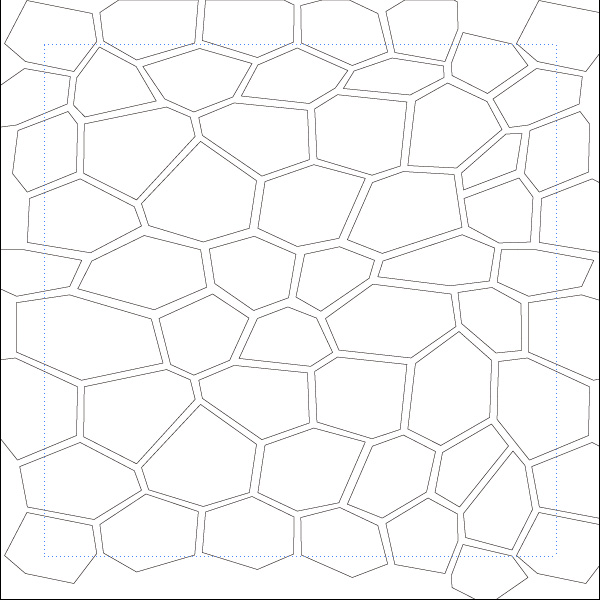
I drew this by 1200px square. This is a seamless pattern by 1024px of the center. The lines are drawn more than needed for a reason. Export this as a SVG file, and import it into MODO.
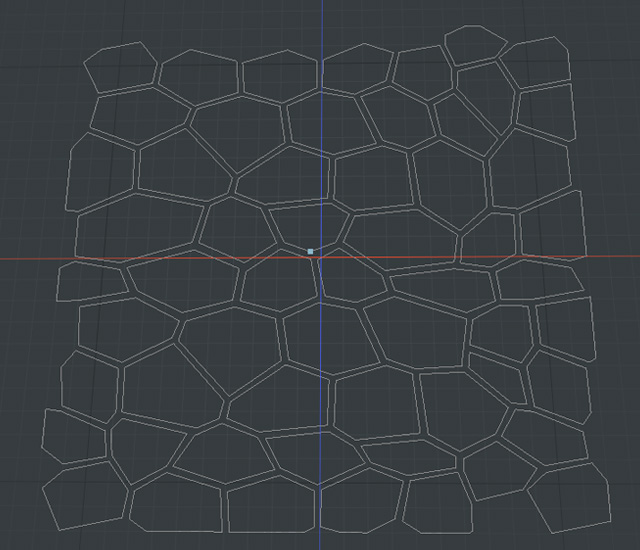
I put surfaces on those poly lines. I got a square mesh like this.
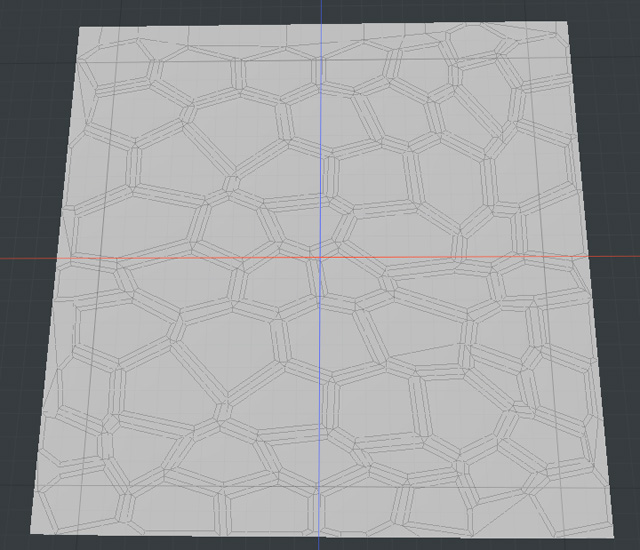
Expand a UV map of this properly, and duplicate this mesh. Extrude it with bevel tool.
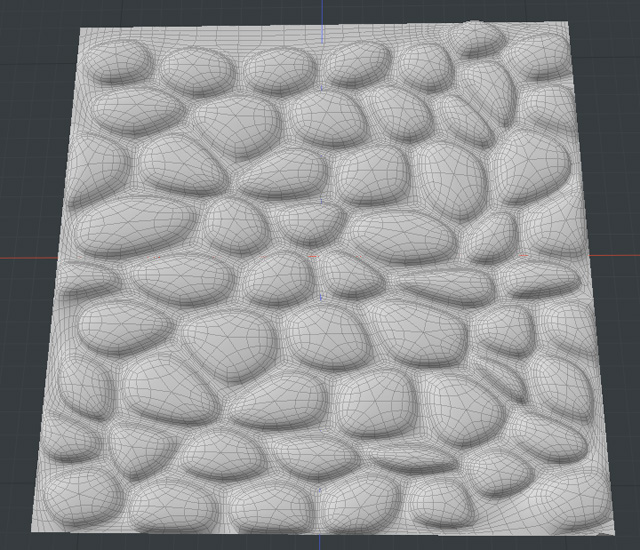
Set a same material for both flat and complex meshes. This allows me to bake normals of the complex mesh onto the flat mesh. Save the normal map as an image and resize it to 1200px square.
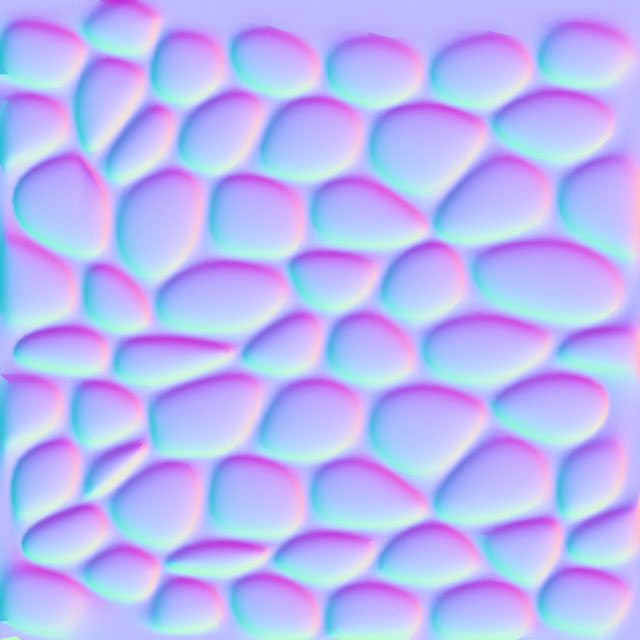
Cut the center of this at 1024px square. It is a seamless 1024px normal map. To tell the truth, there were more twists and turns, though.
Next, use the UV map of the complex mesh as a guide to paste rock images to create a diffuse map and bump map. These also had to be processed so that it could be tiling seamlessly at 1024px square. I studded rock images like a collage. And, I duplicated it moved at 1024px by Slide filter and repaired the seams. Simply I wanted to explain that I didn’t use 2D image materials which I purchased as it is.
Now, I prepared this shader to apply for a 5m square. Users can set numbers and load a plane object in Daz Studio. But, 5m square object is hard to find in Poser. Probably I think the 270 percent plane object of Basics may be about 5m square.
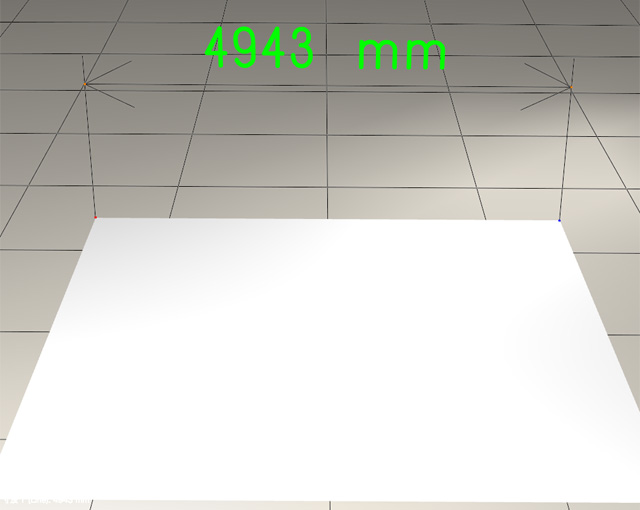
For Poser, I also prepared a preset to apply for Construct’s Ground of Poser. Please select one material of the object to apply the shader. Construct of Poser has two materials, Background and Ground. It is Ground that should apply this shader.
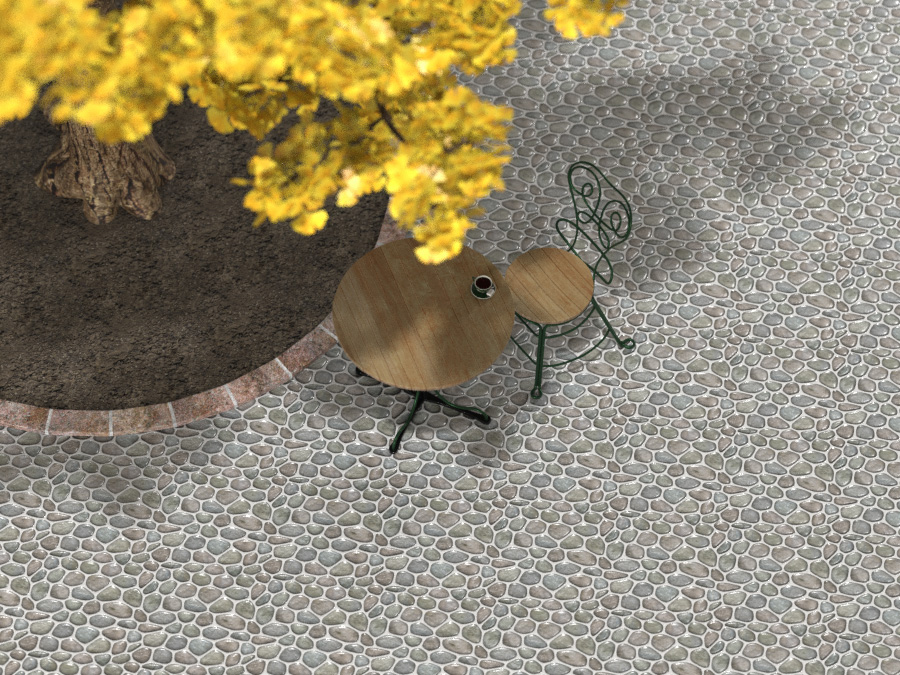
And, This is an Iray render. I applied the shader to a plane object’s “Default” material.
This will be the last work I made this year. I wish you have happy holidays!
mininessie
thanks again for all the wonderful gifts!
Have a great time!
my best wishes!
elleque
Thanks! 😀