 RSS - Posts


I’m sorry. I found some failures on the Daz Studio version of Pranx 2. So, I updated the data. The update notice will reach you soon. And, the Poser version wasn’t changed. Replace the contents of “data” folder with the new data completely.
Now, I got a new product of Pranx 2’s clothing, but it hasn’t Daz Studio version. I think that Daz Studio users familiar to convert Poser contents than me. But, probably there are also many users who don’t use such options of Daz Studio.
This time, I try an explanation with Daz Studio 4.9. There is no difference also with the latest Daz Studio. And first, I will let you know that my procedure may be not necessarily right. I am not perfect for the rigging of figures. My purpose is to show off my designs by my product and freebies. Please look for more better tutorials on the Internet.
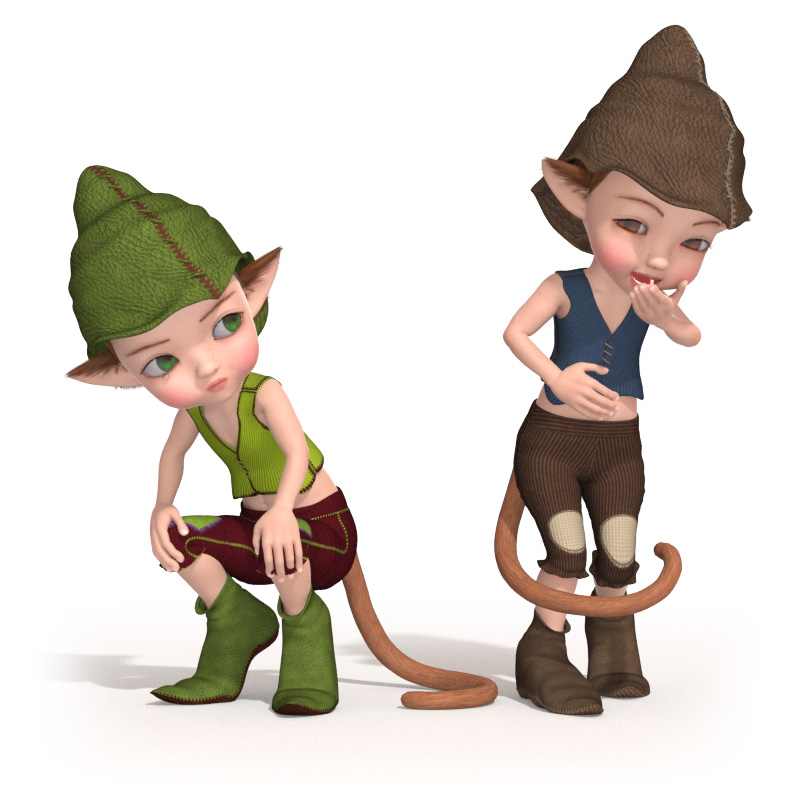
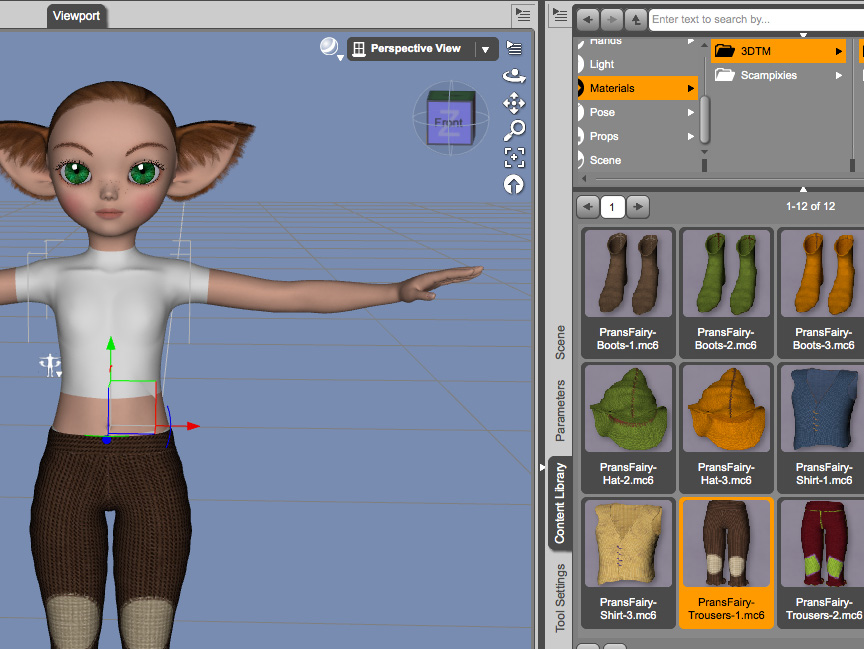
I am going to use this product;
Pranxs-Fairy by 3DTubeMagic
I think that convert of such pants style clothes is comparatively easy. And, finally I will use these free poses.
Some Poses for Pranx 2-Chibi by Pommerlis
Some Poses for Pranx 2 by Pommerlis
Convert objects to Daz Studio contents
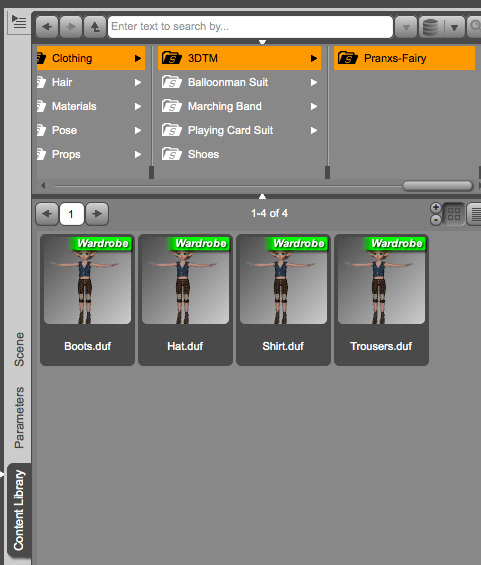
Look for the place of the object files first. They are in “Runtime\Geometries \3DTM \Pranxs-Fairy\” if you installed the contents correctly.
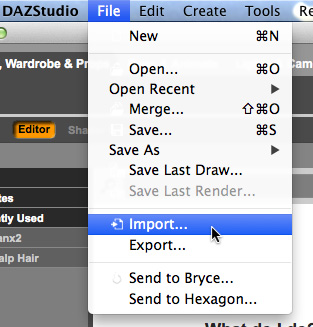
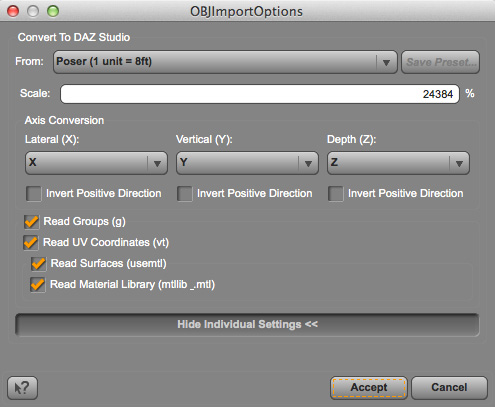
Start Daz Studio and load Pranx 2 into your work space. And, select “Import” from “File” of the menu bar. Select “Poser(1 unit=8ft) on the window of “OBJ Import Options”, and accept it.
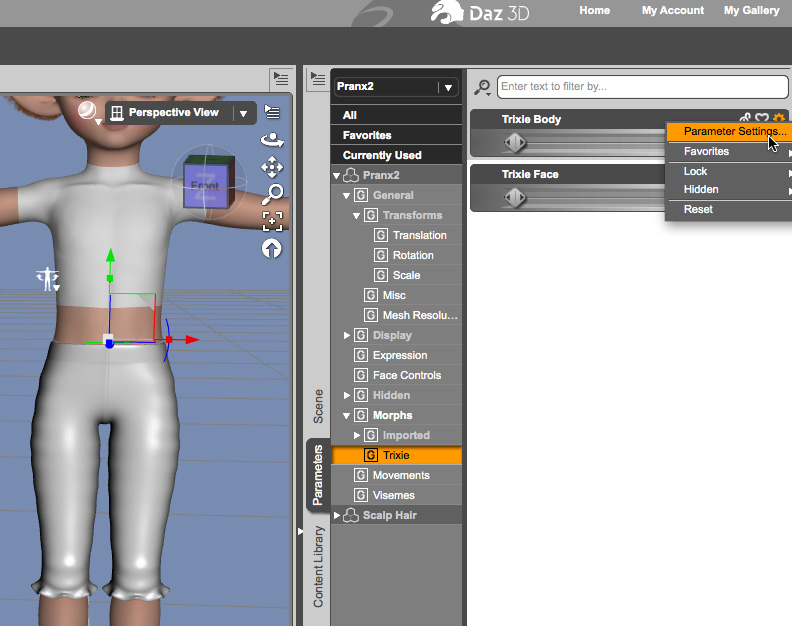
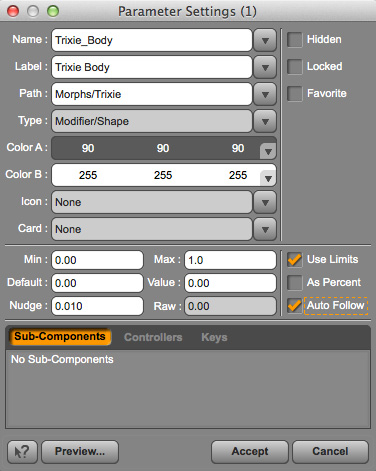
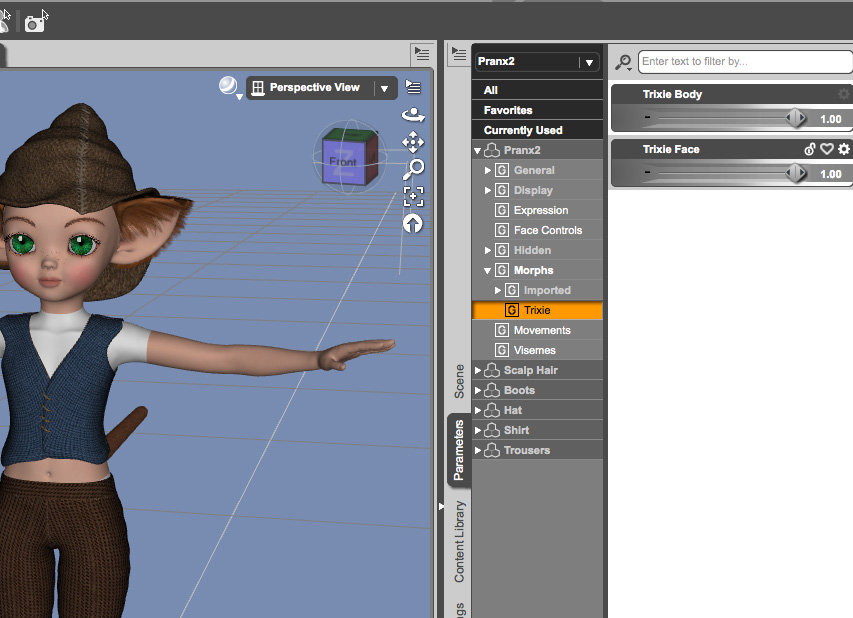
Look at Pranx 2’s morph “Trixie” on its Parameters tab. Click on the small gear icon and open its “Parameter Settings…”. Check the box of “Auto Follow”.
Apply the morph of “Trixie” to Pranx 2. Trixie’s shape will overflow the clothing OBJ. And, select the clothing OBJ on the scene tab, and start “Transfer Utility”. It is here; Menu bar -> Edit -> Object -> Transfer Utility.
I am not familiar with using this tool. I think that the settings will be different by the OBJ. I usually used the default settings. But, I checked “Content Type” this time, and selected “Follower/Wardrobe/Pant”. You can change this by “Content DB Editor” later. But, I don’t know whether such time and effort are needed for hobby works. So, I don’t talk in detail about this editor.
The obj will be changed to a clothing figure after clicking “Accept”.
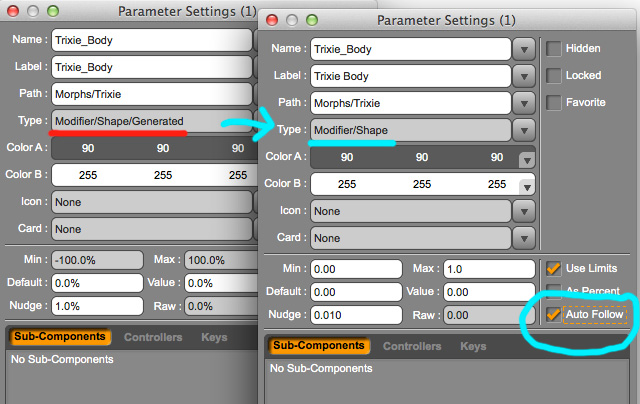
Confirm the clothing’s morph. Open the Parameter Settings of its “Trixie” morph. And, check the “Auto Follow” is checked. And, see “Type:” on the window of Parameter Settings. Select “Modifier/Shape” from the jump menu on the right of its text field. If you forgot this setting, the morph will not be included into the clothing.
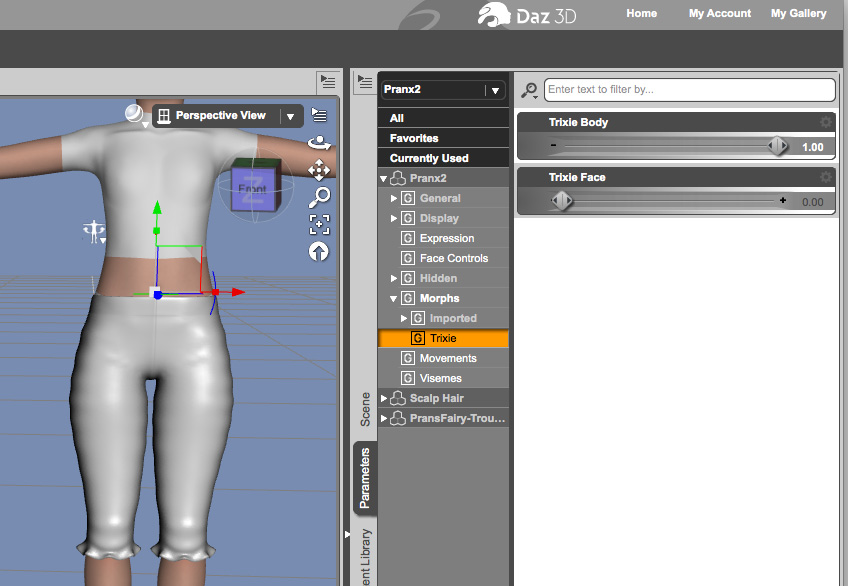
Remove the check of “Auto Follow” from Pranx 2 figure’s “Trixie” morph. And, save the scene file. Reopen the scene file and apply the “Trixie” morph of Pranx 2 figure. The clothing will apply the same morph following Pranx 2.
I also converted other clothings in the same process. But, I removed Pranx 2’s “Auto Follow” on the Hat before using the “Transfer Utility”. Because usually Hats don’t need the body morph. Or, the Hat may not need to be converted as a figure clothing.
Next, let’s set up the materials.
Add Materials
If you installed Poser product correctly, they must be in your Runtime folder as Poser contents. Search the document by DAZ3D, if you need how to read Poser contents.
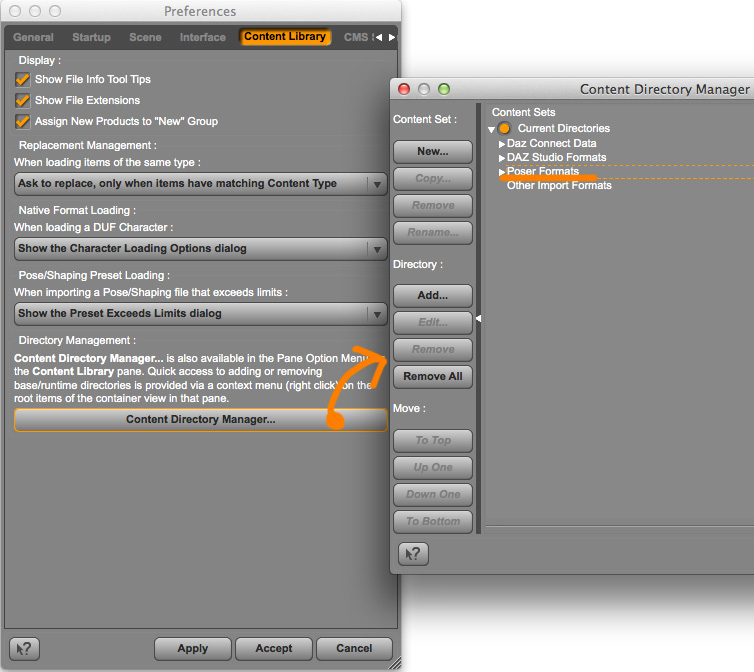
If your Content Directory Manager has correct pass to Poser Formats, you will find the materials for the clothing product on Poser Formats of your Content Library. Select the clothing figure and double-click on the icon of a material.
The Poser materials usually aren’t applied correctly with Daz Studio. Especially the Bump Strength will be wrong. Look for the material settings of Daz Studio by Internet. I can’t explain them simply.
Next, I try to explain about how to save the clothing figure to your library.
Save the contents
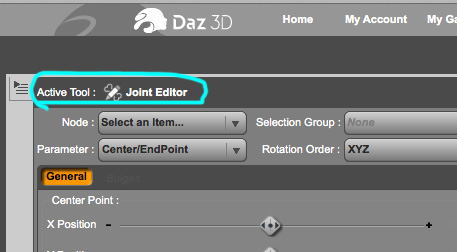
Select the clothing figure, and show the tab of “Tool Settings”. Change the tools to “Joint Editor”.
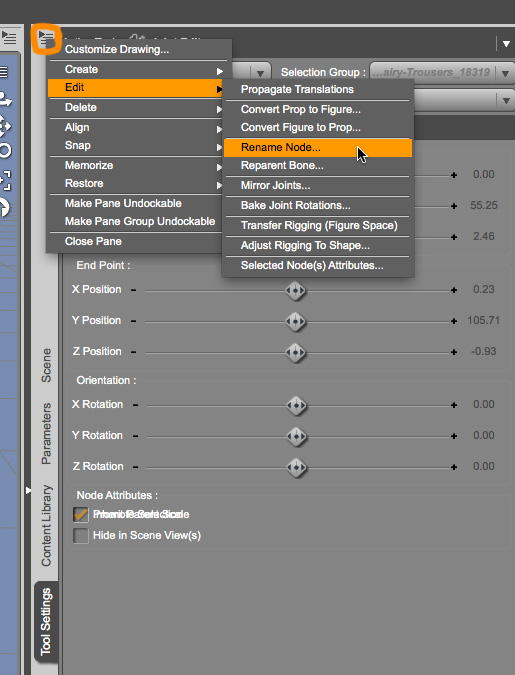
You will find “Edit” on the small menu of “Joint Editor”. There is “Rename Node …” under “Edit”.
Daz Studio already prepared the default names for your items. You can change the names.
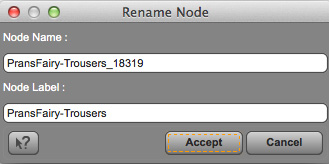
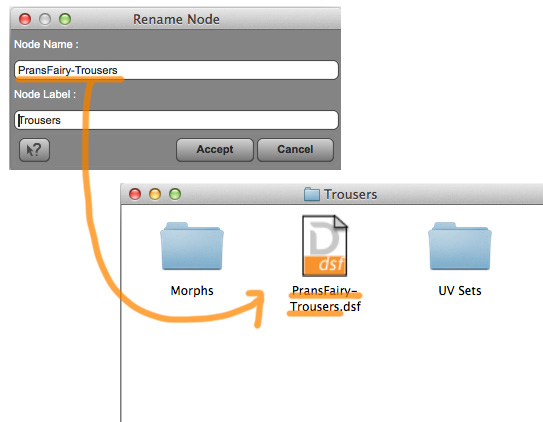
“Node Name: ” will be a file name of saved DSF in your data folder.
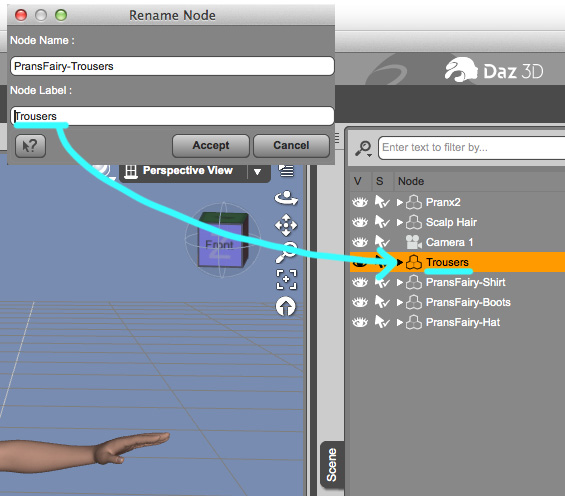
“Node Label: ” will be a display name of the clothing in your scene tab.
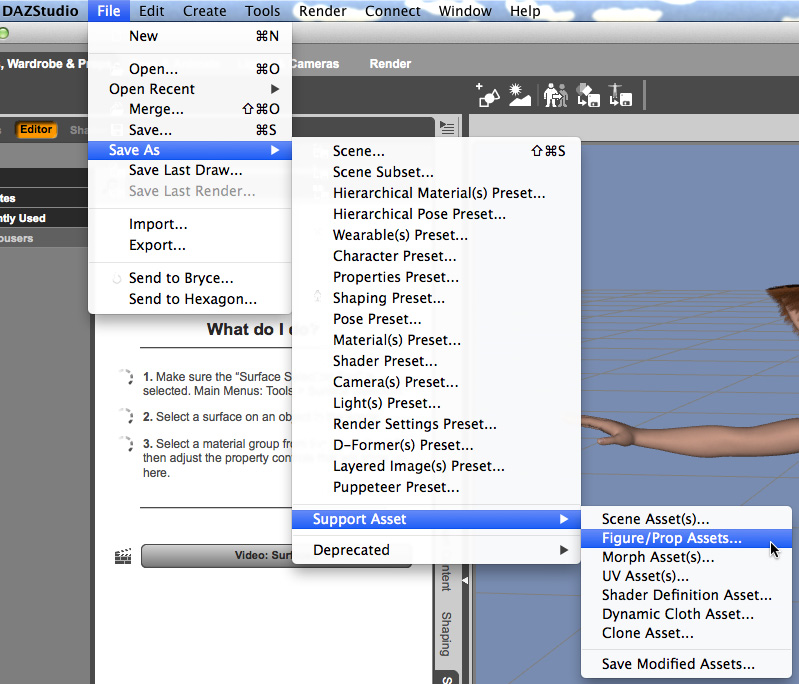
Let’s save the content. Select “Save As…” from “File” of the menu bar.
I made sub folders in the Pranx 2’s clothing folder. And, this file name of the DUF will be displayed in your contents library. The display names may be different on the scene tab and the contents library. It is decided by you.
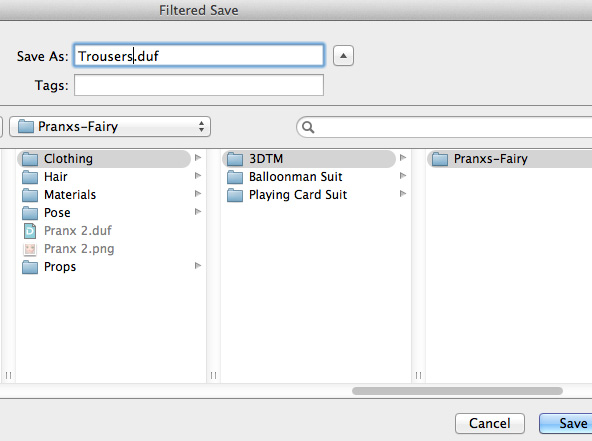
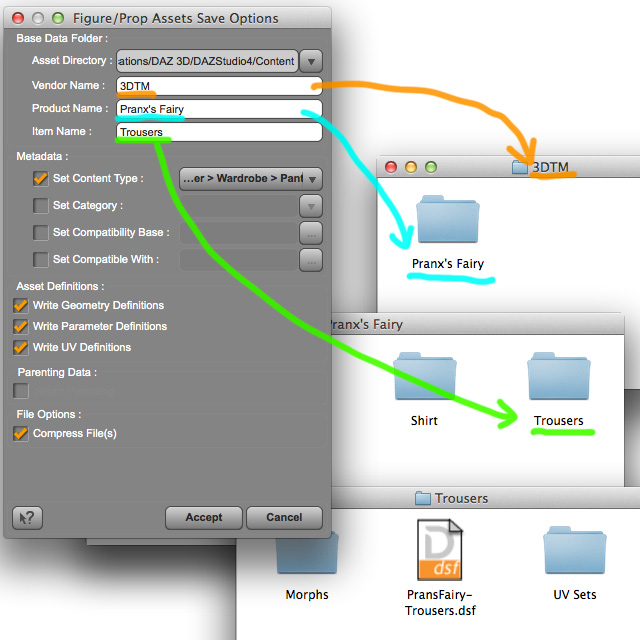
Edit “Figure/Prop Assets Save Options”. “Vendor Name: ” will make a folder of the same name in your data folder. Usually the creator’s name of the contents will be set there. “Product Name: ” will make a folder of the same name under the folder of creator’s name. “Item Name: “ will make a folder of the same name under the folder of Product name.
This is an example of saved files.
Some adjustments
The saved clothes will be fit to Pranx 2 figure automatically. But, I think that some adjustments still may be needed.
I saw a problem on the Hat.
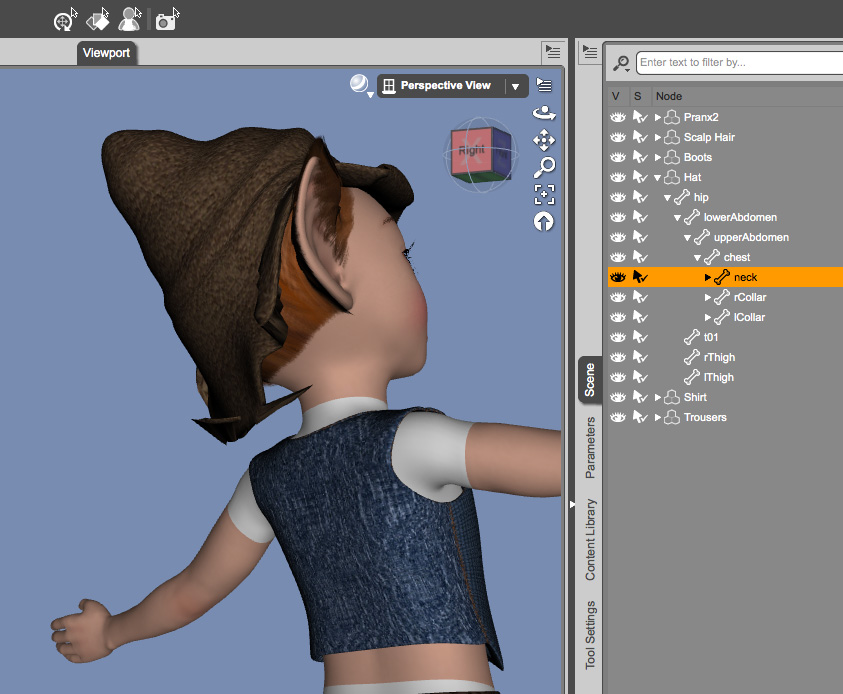
Probably the Hat didn’t need to be converted into a figure. Such an item may be good as a prop. Well, this time I tried to adjust this problem as it is. It is a cause that the Hat’s weight-maps were assigned to some body parts.
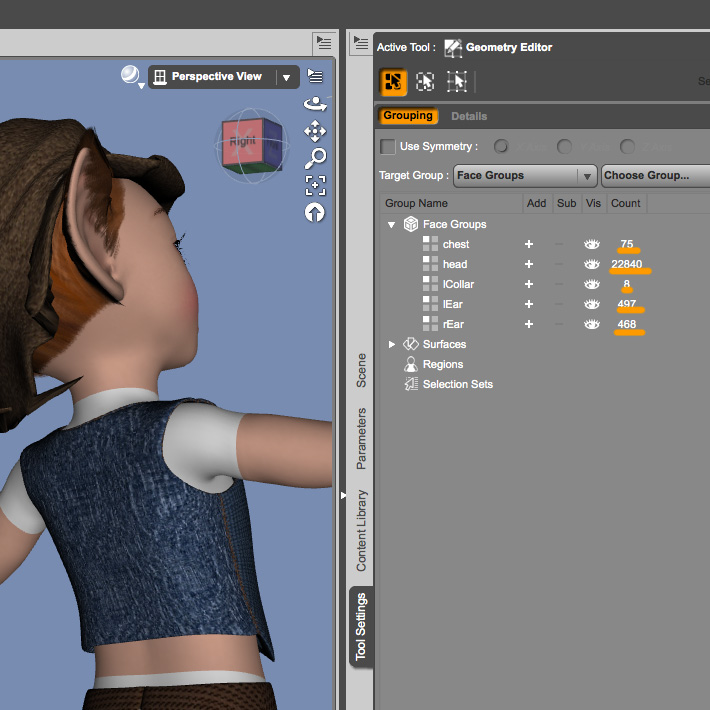
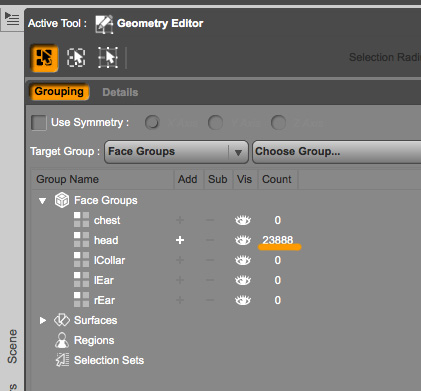
Select the Hat and show “Geometry Editor” on the tab of “Tool Settings”. There are some face groups. Let’s move all face groups to the group of “head”.
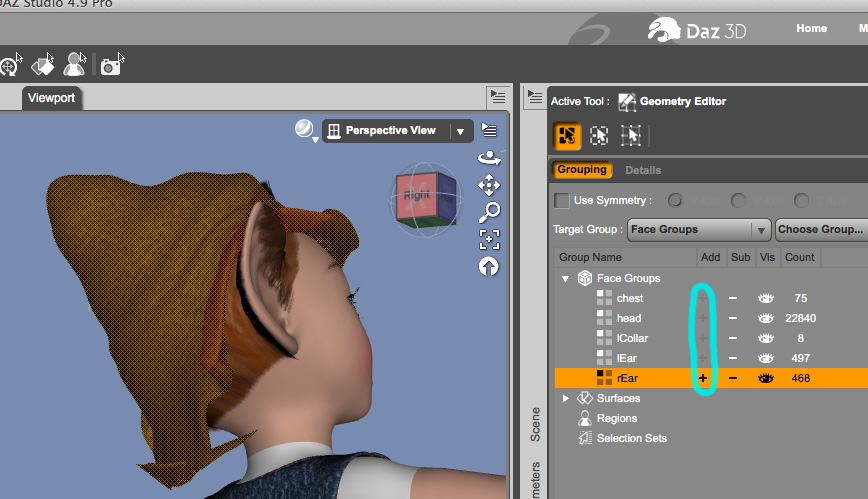
Click the plus(+) of all the face groups. All the geometries of the Hat were selected.
Right-click on the Face Groups of “head”. And, select “Assign Selected Faces to Group”.
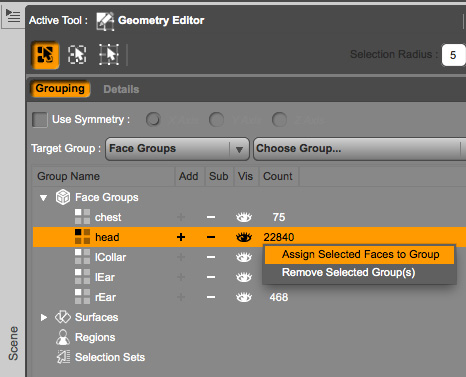
All geometries will be assigned to “head”. Don’t cancel the selection yet.
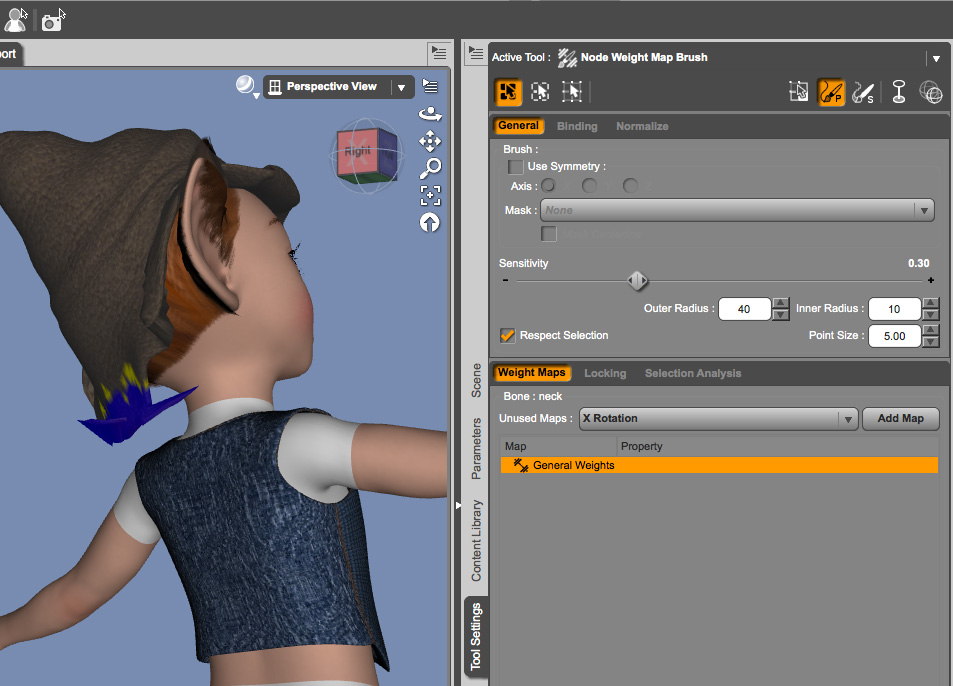
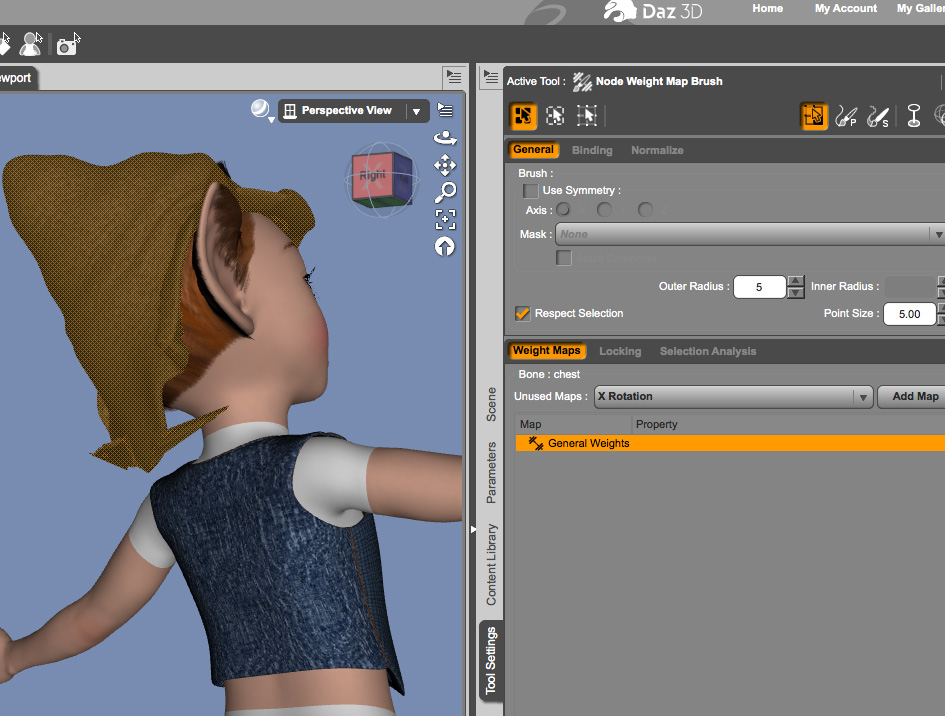
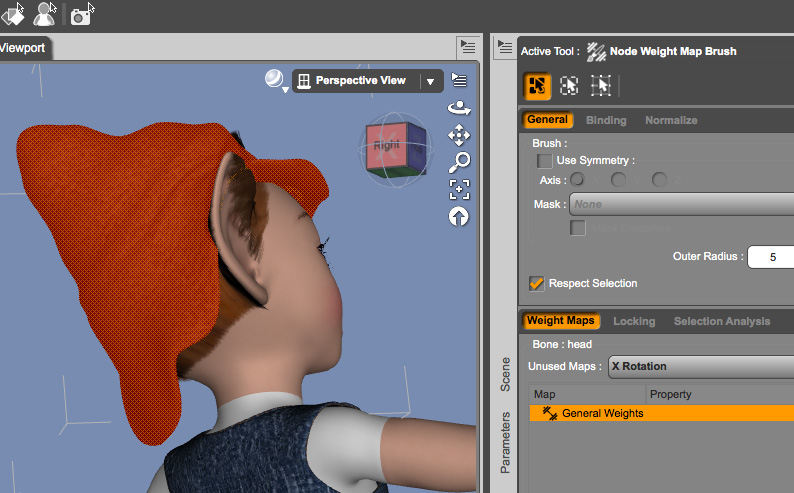
Select “head” of the Hat’s node on “Scene” tab. And, show “Node Weight Map Brush” on “Tool Settings” tab.
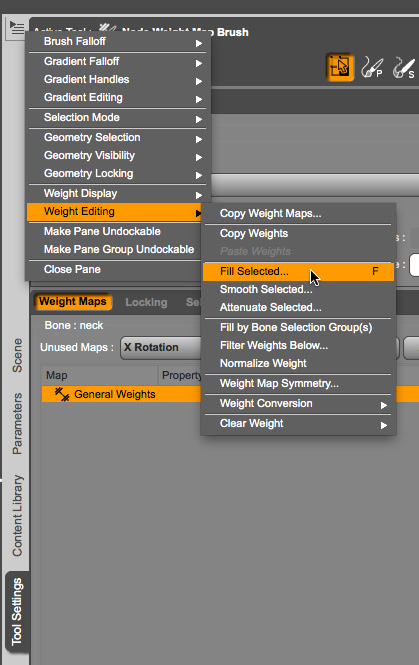
Use “Fill Selected” of “Weight Editing” of the small menu.
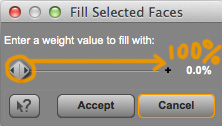
Set the value with 100% and accept it.
Confirm whether all the weight-maps moved to the head. Don’t cancel the selection yet. The selected geometries will be painted red.
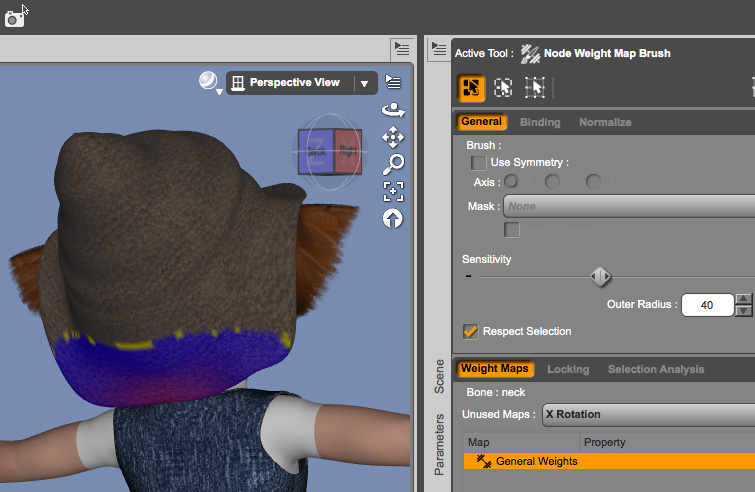
But, sometimes some maps may be not painted red. In such a case, select the other parts on the scene tab and see its weight-maps. Some weight-maps may be remaining on the ears or neck. Use “Fill Selected” with 0% to each parts. After it, use “Fill Selected” with 100% to the head’s weight-maps again. Although I made a little weight-maps to the Hat’s neck, it is an own taste.
I save the modified Hat by “Save As” again. I overwrote the old file by the modified file with the same settings as last time. If you are a product creator, you probably have to edit the categories and Data Base. Search its way with the Internet. I don’t make reference about it here. I don’t know it well.
And, Daz Studio doesn’t make the references to the OBJ files. OBJ files are saved in your data folder as the DSF. So, I can’t distribute these converted files. Because it is an illegal act.
Use Poser Pose with Daz Studio
The Daz Studio version of Pranx 2 is a completely Daz Studio figure. Almost Poser poses aren’t correctly set to it.
Pommerlis made some lovely poses for Pranx 2. Daz Studio users are able to use those poses as the Poser Contents. But, some adjustments are needed. Because the Daz Studio version of Pranx 2 has some different bones from its Poser version.
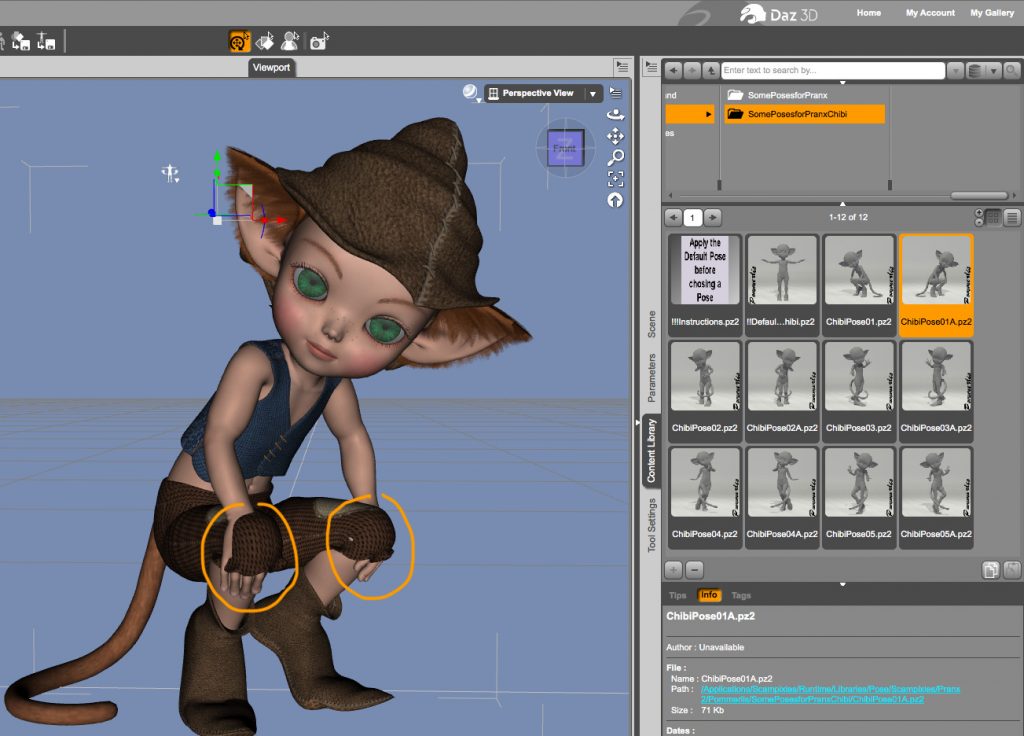
I added the value of Twist to its lCollar and rCollar a little.

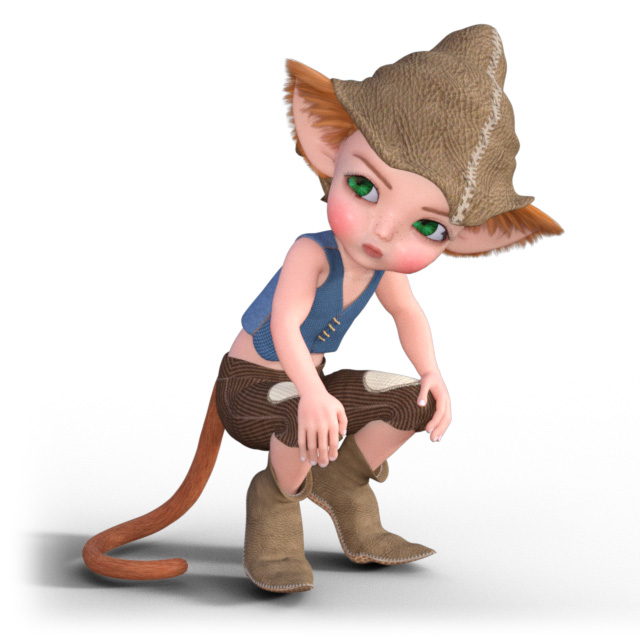
Completed!
Ines Rodriguez Vega
wow! thank you so much for this…i will take a more deep look when i have time.
elleque
I hope this is helpful to someone 🙂
Jan Freeman
Wow!! Elleque!! I will probably just use the Poser version!! This looks very difficult and complicated. Thank you for doing all of this work. I must go to bed and work tomorrow, however Thursday, I will make print screens of this just to have in case I need to do this!!!
elleque
You are welcome 🙂 This is my tickler file. Though Poser is easy to use, DAZStudio is interesting too. But, I tend to forget how to use the programs soon.